The Gravel Driveway Dilemma: A Love/Hate Relationship
Ah, the humble gravel driveway – it’s the unsung hero of suburban landscapes, isn’t it? On one hand, it provides a rustic charm and a satisfying crunch underfoot that simply can’t be replicated by boring old concrete or monotonous asphalt. But on the other hand, it can also be a real pain to maintain, am I right?
I’ll never forget the first time I had to tackle the task of caring for my own gravel driveway. It was shortly after I bought my house, and I remember staring out at the expanse of loose stones, feeling completely overwhelmed. Where do I even start? Do I need special equipment? What if I mess it all up and end up with a muddy, weed-infested mess?
But after doing a bit of research and learning some tried-and-true gravel driveway maintenance techniques, I can proudly say that I’ve got this whole gravel driveway thing down to a science. And you know what? It’s actually kind of satisfying in its own way. There’s something meditative about meticulously raking and grooming those stones, like a zen garden but for cars.
So if you’re in the same boat as I was – staring down your gravel driveway, wondering how the heck you’re going to keep it looking its best – fear not, my friend. In this comprehensive guide, I’m going to walk you through everything you need to know about caring for and maintaining a gravel driveway, from top to bottom. Get ready to wave goodbye to those pesky weeds and potholes forever!
Understanding the Anatomy of a Gravel Driveway
Okay, let’s start with the basics. What exactly is a gravel driveway, and what makes it different from other types of driveways? Well, the key difference lies in the construction.
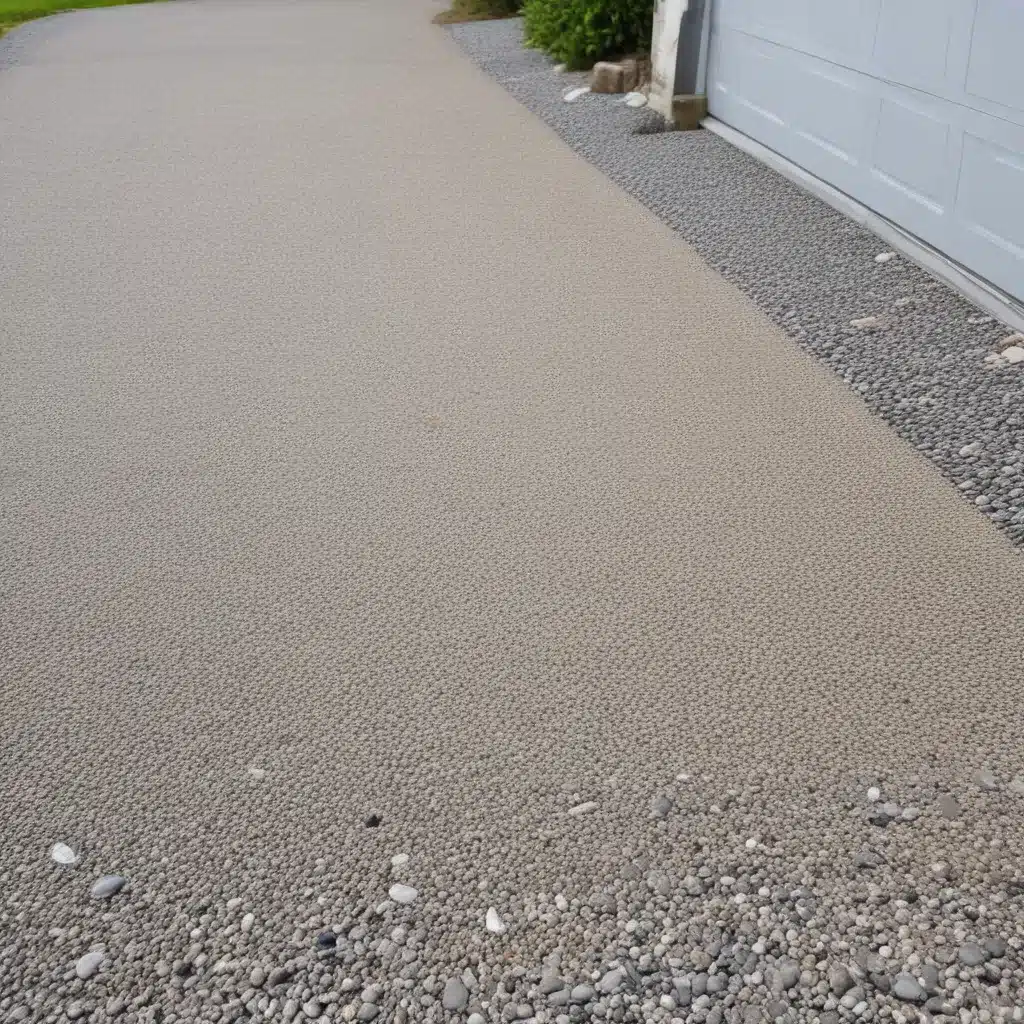
Unlike concrete or asphalt driveways, which are basically just solid slabs of material, a gravel driveway is made up of several distinct layers. At the very bottom, you’ll find a foundation of compacted soil or gravel. On top of that, there’s typically a layer of larger, coarser stones (often called “crushed rock” or “base gravel”) that provide a sturdy base. And finally, the top layer is made up of smaller, finer gravel that gives the driveway its characteristic crunchy texture.
This multi-layered construction serves an important purpose – it allows water to drain through the driveway instead of pooling on the surface. This is crucial, because standing water can lead to all sorts of problems, like potholes, ruts, and weed growth. The gravel layers essentially act as a natural drainage system, channeling excess moisture away from the driveway.
But of course, that drainage capability means that gravel driveways also require a bit more TLC than their paved counterparts. The stones can shift and settle over time, and weeds and other vegetation can creep in if you’re not vigilant. That’s why it’s so important to have a solid maintenance plan in place.
Laying the Groundwork: Prepping Your Gravel Driveway
Before we dive into the nitty-gritty of ongoing maintenance, let’s talk about the initial prep work that’s crucial for a healthy, long-lasting gravel driveway. After all, if the foundation isn’t solid, no amount of maintenance is going to fix it.
The first step is to make sure the ground underneath your driveway is properly prepared and compacted. This typically involves excavating the area, leveling out any uneven spots, and then tamping down the soil to create a firm, stable base. If the soil is particularly soft or unstable, you may need to add a layer of crushed stone or geotextile fabric to reinforce it.
Next, you’ll want to lay down a thick base of coarse, crushed gravel. This is the foundation that your driveway will be built upon, so you want to make sure it’s substantial and well-compacted. Aim for a base layer that’s at least 4-6 inches deep, and use a heavy roller or plate compactor to really pack it down.
Once the base is in place, you can start adding the top layer of finer gravel. This is where you can get a bit creative – there are tons of different sizes, colors, and types of gravel to choose from, so you can really customize the look of your driveway. Just keep in mind that the smaller the gravel, the more prone it is to shifting and rutting over time.
As a general rule of thumb, I recommend using a gravel that’s about 1/2 to 3/4 inch in size for the top layer. This strikes a nice balance between stability and that satisfying crunch we all love. And don’t be afraid to experiment a bit – maybe try mixing in some larger stones for visual interest, or incorporating a pop of color with crushed granite or river rock.
The final step in the prep process is to make sure your driveway has proper drainage. This might involve installing french drains, swales, or other features to channel water away from the surface. Trust me, taking the time to get this right upfront will save you a ton of headaches down the road.
Maintaining the Mighty Gravel Driveway
Alright, now that we’ve got the initial setup taken care of, let’s talk about the ongoing maintenance that’s required to keep your gravel driveway in tip-top shape. I know, I know – it’s not the most glamorous task, but trust me, a little elbow grease now will pay off big time in the long run.
The key to effective gravel driveway maintenance is regularity. You can’t just let it go for months at a time and then try to tackle it all at once. Instead, I recommend setting aside a few hours every few weeks to tend to your driveway. It might seem like a hassle, but it’s honestly kind of meditative – think of it as your own personal zen garden, but for cars.
The first and most important maintenance task is raking and grooming the gravel. Over time, the stones can shift and settle, creating uneven spots and potholes. By regularly running a garden rake or gravel rake over the surface, you can help keep everything nice and level. Pay close attention to the edges and corners, where gravel tends to accumulate.
While you’re out there raking, keep an eye out for any weeds or vegetation that might be trying to take over. Gravel driveways are prime real estate for opportunistic plants, and if you let them get out of control, it can really mess up the whole look and function of your driveway. Whenever you spot any weeds, be sure to pull them out from the roots.
And speaking of pulling things out, don’t forget to check for any debris or larger rocks that may have found their way into the gravel. Things like sticks, leaves, or oversized stones can disrupt the smooth, uniform appearance of your driveway, so be diligent about removing them.
Finally, don’t forget to add new gravel as needed. Over time, the top layer will start to thin out and become sparse, especially in high-traffic areas. Replenishing the gravel on a regular basis – maybe once or twice a year – will help keep your driveway looking fresh and pristine.
When it comes to adding new gravel, I recommend using the same size and type that you originally installed. This will help maintain a cohesive, seamless look. And be sure to spread it out evenly, using a rake or shovel to work it into the existing gravel. You may also want to give the whole area a light compaction with a roller or tamper to really lock everything in place.
Dealing with Drainage Dilemmas
One of the biggest challenges with gravel driveways is keeping water under control. Since they’re porous by nature, they’re more susceptible to drainage issues than their paved counterparts. But fear not – there are plenty of strategies you can use to keep that pesky moisture at bay.
First and foremost, make sure your driveway is properly sloped to allow water to run off and away from your home. Ideally, you want a slight downward grade of 1-2% from the house to the street. This will help prevent puddles and pooling, which can lead to all sorts of problems like potholes, ruts, and weed growth.
If you notice any areas of your driveway where water tends to collect, consider adding some additional drainage features like swales, French drains, or catch basins. These can help channel excess moisture away from the gravel and prevent it from seeping into the ground below.
And speaking of the ground, don’t forget to keep an eye on the soil underneath your driveway as well. If it becomes waterlogged or saturated, it can cause the gravel to shift and settle unevenly. In cases of really poor soil drainage, you may need to excavate and replace the base layers to create a more stable foundation.
One final tip for managing water on your gravel driveway: be mindful of where you’re directing downspouts and gutters. You don’t want all that roof runoff spilling directly onto your driveway, as it can quickly erode the gravel and turn your lovely zen garden into a muddy mess.
Dealing with Winter Woes
Ah, the joys of a gravel driveway in the wintertime. On one hand, it can provide a nice, sturdy surface for getting in and out when the snow and ice are piling up. But on the other hand, it also comes with its fair share of challenges.
The biggest issue you’re likely to face is what I like to call the “freeze-thaw cycle.” As temperatures fluctuate above and below the freezing point, the water in the gravel can repeatedly freeze and thaw. This causes the stones to shift and heave, creating uneven surfaces and potholes.
To combat this, I recommend investing in a good quality snow plow or snowblower. Keeping the driveway clear of snow and ice is crucial, as it helps prevent that dreaded freeze-thaw cycle from wreaking havoc. And be sure to use a plastic or rubber-edged plow, as metal blades can actually damage the gravel surface.
You may also want to consider applying a salt-based deicer to your driveway after plowing. This will help melt any remaining ice and keep the gravel from freezing back up. Just be mindful of the type of deicer you use, as some can be corrosive to the gravel or the surrounding vegetation.
Another wintertime woe to watch out for is the potential for your gravel to get buried under heavy snowfall. If you let it accumulate too much, it can become difficult to plow and can even start to compact down into an icy, impassable mess. Make sure to clear the snow after every storm, even if it’s just a light dusting.
And speaking of compaction, be extra vigilant about maintaining your gravel driveway in the spring. All that heavy snow and ice can really pack the stones down, so you may need to do some extra raking and replenishing to bring it back to its former glory. Bonus points if you can get out there while the ground is still slightly frozen – the stones will be easier to work with.
Sprucing Up Your Gravel Driveway
Okay, so we’ve covered all the nitty-gritty maintenance tasks, but what about making your gravel driveway look its absolute best? After all, it is the first thing people see when they approach your home, so you’ll want it to make a good impression.
One simple way to give your driveway a little visual boost is to add some edging. This can be as simple as lining the perimeter with some landscaping timbers or stones, or you can get a bit more elaborate with paved borders or even flowering plants. Just be sure to choose materials and plants that complement the rustic, natural vibe of the gravel.
Speaking of plants, you can also use strategic landscaping to really enhance the look of your driveway. Lining the edges with low-growing shrubs or perennials can add a lovely, cohesive look. And don’t be afraid to get a little creative – maybe incorporate some ornamental grasses or even a small water feature like a bubbling urn or fountain.
If you’re really feeling ambitious, you could even consider adding some decorative gravel accents. For example, you could create a small patio or seating area near the entrance of your driveway, using a contrasting color or texture of gravel to make it stand out. Or you could incorporate some winding gravel paths that lead to garden beds or other landscape features.
And let’s not forget about lighting! Strategically placing some path lights or up-lighting along your driveway can really elevate the look and make it feel more welcoming, especially during the evening hours. Just be sure to choose fixtures that are durable and weatherproof, as they’ll need to stand up to the elements.
Ultimately, the key is to think of your gravel driveway as an extension of your home’s overall landscape design. By putting a little thought and creativity into it, you can transform it from a plain, utilitarian space into a true showpiece.
The Joys (and Occasional Trials) of Gravel Driveway Ownership
Well, there you have it – my comprehensive guide to caring for and maintaining a gravel driveway. I know it might seem like a lot of work, but trust me, it’s so worth it. There’s just something so satisfying about keeping that gravel in tip-top shape, you know?
And let’s not forget about the other perks of having a gravel driveway. For one thing, it’s typically much more cost-effective to install and maintain than paved options like concrete or asphalt. And let’s not forget about the rustic, charming aesthetic that gravel brings to the table. It’s like having your own little slice of the countryside, right in your suburban oasis.
Of course, it’s not all sunshine and rainbows. There are definitely some challenges and frustrations that come with gravel driveway ownership. The constant battle against weeds and erosion can be enough to make even the most dedicated homeowner want to throw in the trowel. And don’t even get me started on the wintertime headaches.
But you know what they say – anything worth having is worth working for. And when it comes to my gravel driveway, I can honestly say that the effort is more than worth it. There’s just something so therapeutic about meticulously grooming those stones, knowing that I’m preserving the integrity and appearance of my little corner of the world.
So if you’re on the fence about taking on a gravel driveway, I say go for it! Just be prepared to roll up your sleeves and get a little dirty. But trust me, the payoff is huge. You’ll have a driveway that’s not only functional and low-maintenance, but also utterly charming and unique. What could be better than that?
And if you ever find yourself in need of some extra gravel or other driveway services, be sure to check out Driveways Warrington. They’ve got all the materials and expertise you need to keep your gravel driveway looking its absolute best. Happy grooming, my friends!

