The Dreaded Driveway Crack: A Story of Resilience and DIY Determination
Oh, the joys of homeownership – where every crack, crevice, and crumble in the driveway becomes a source of endless frustration and sleepless nights. Well, my friends, fear not! Today, I’m here to guide you through the sometimes-daunting, yet incredibly rewarding, process of sealing and repairing those pesky concrete driveway cracks.
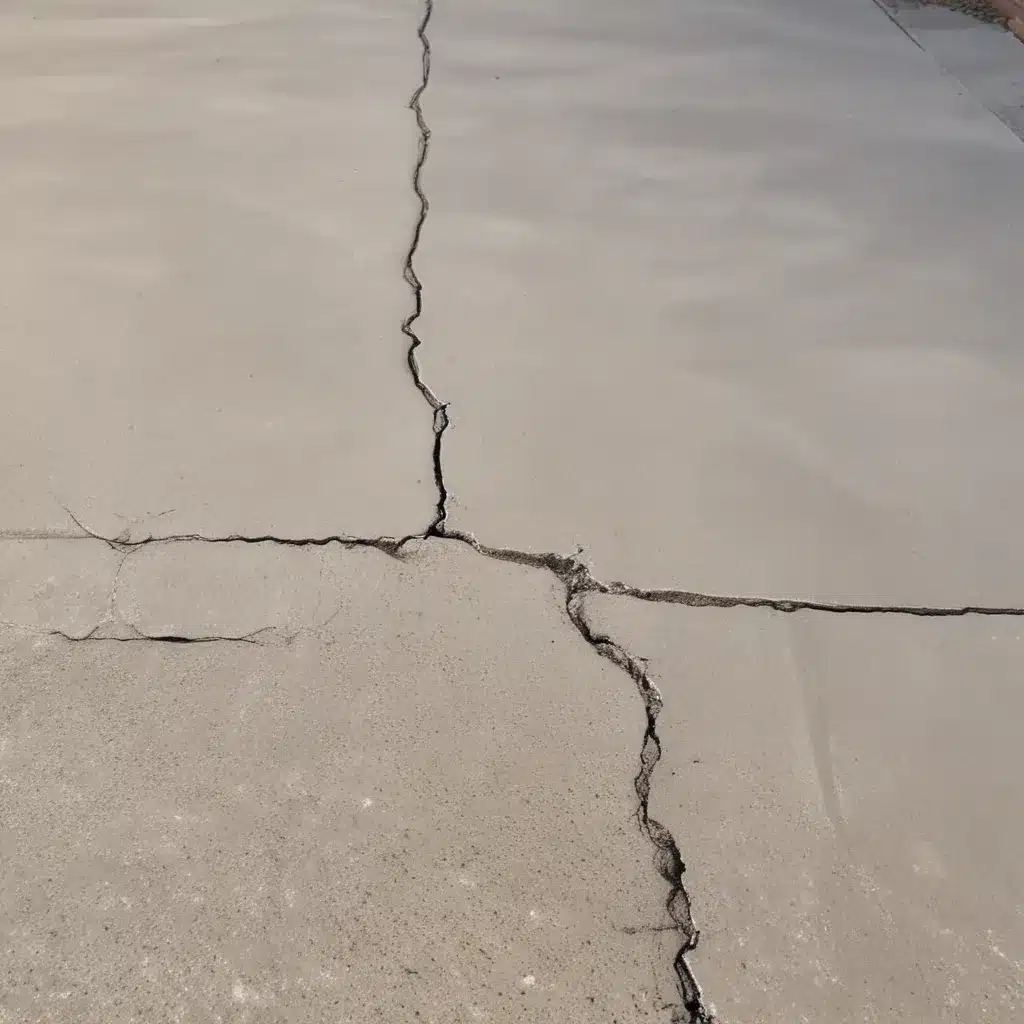
You see, I’ve been there myself – staring out at my once-pristine driveway, watching helplessly as Mother Nature slowly but surely worked her magic, transforming that smooth expanse of gray into a veritable obstacle course of jagged lines and gaping holes. But, you know what they say: when life gives you cracked driveways, you make… well, let’s just say I became a DIY master of driveway repair.
Understanding the Anatomy of a Driveway Crack
Before we dive into the nitty-gritty of sealing and repairing, it’s important to understand the underlying causes of those dreaded driveway cracks. You see, concrete, while incredibly durable, is not immune to the forces of nature. Fluctuations in temperature, shifting soil, and good old-fashioned wear and tear can all wreak havoc on your driveway’s structural integrity.
Imagine your driveway as a living, breathing entity, constantly responding to the ebb and flow of its environment. As the ground beneath it expands and contracts, the concrete is forced to adapt, sometimes resulting in those unsightly cracks. And let’s not forget about the impact of heavy vehicles and the weight of snow and ice – these factors can also contribute to the demise of your driveway’s flawless facade.
But fear not, my fellow concrete enthusiasts! Understanding the root causes of driveway cracks is the first step towards finding a lasting solution. Armed with this knowledge, we can tackle the problem head-on and restore our driveways to their former glory.
Assessing the Damage: A Step-by-Step Guide
Now that we’ve delved into the underlying causes of driveway cracks, it’s time to take a closer look at the damage and determine the best course of action. After all, not all cracks are created equal, and the approach to repairing them can vary significantly.
Let’s start with a little self-assessment. Take a good, hard look at your driveway and take note of the size, depth, and location of the cracks. Are they small, hairline cracks, or are we talking about gaping, cavernous rifts that could swallow a small child? (Okay, maybe not that extreme, but you get the idea.) Knowing the specifics of the damage will help you select the appropriate repair materials and techniques.
Next, consider the overall condition of your driveway. Are the cracks isolated incidents, or do they seem to be part of a larger pattern of deterioration? If the latter is true, it may be time to start thinking about a more comprehensive driveway resurfacing project. But we’ll save that discussion for another day – for now, let’s focus on those individual cracks and how to tackle them.
Sealing Those Pesky Cracks: A DIY Masterclass
Alright, now that we’ve assessed the damage, it’s time to get our hands dirty and start sealing those cracks. This is where the real fun begins, my friends. Grab your tools, don your best DIY outfit, and let’s get to work!
The first step in the crack-sealing process is to thoroughly clean the affected area. Use a stiff-bristled brush to sweep away any debris, dirt, or loose material that might be lurking in the cracks. This will ensure that the sealant has a clean, stable surface to adhere to, maximizing its effectiveness.
Next, it’s time to choose your sealant. There are a variety of options out there, ranging from basic concrete caulk to more advanced polymer-based sealants. Personally, I’m a big fan of the polymer-based variety – they tend to be more flexible and durable, able to withstand the constant expansion and contraction of the concrete.
Once you’ve selected your sealant, the application process is relatively straightforward. Simply follow the manufacturer’s instructions to the letter, carefully filling the cracks and smoothing the surface to create a seamless, watertight seal. And remember, patience is key – rushing through this step can lead to sloppy results and a less-than-satisfactory finish.
Tackling Larger Cracks: When DIY Gets Serious
Ah, but what about those pesky, gaping cracks that are just too large to be tamed by a simple sealant? Fear not, my friends, for we have solutions for even the most stubborn of concrete conundrums.
In these cases, it’s time to break out the big guns – the epoxy resin. This magical elixir of the DIY world is the perfect weapon against those deep, wide cracks that simply won’t budge. The key is to carefully clean the affected area, ensuring that it’s free of any debris or moisture, and then meticulously apply the epoxy according to the manufacturer’s instructions.
Now, I know what you’re thinking: “Epoxy resin? That sounds like some serious business!” And you’d be right. Working with epoxy can be a bit more challenging than your average crack-sealing job, but trust me, the results are well worth the effort. The epoxy will create a strong, durable bond that can withstand the elements and effectively seal even the most stubborn of cracks.
But don’t worry, I’ve got your back. I’ll walk you through the process step by step, from proper surface preparation to the ins and outs of epoxy application. Together, we’ll conquer those concrete canyons and restore your driveway to its former glory.
Preventing Future Cracks: A Proactive Approach
Ah, but the story of driveway crack repair doesn’t end there, my friends. You see, once you’ve conquered the existing cracks, it’s time to shift your focus to prevention. After all, what’s the point of all this hard work if those pesky cracks are just going to come back and haunt you in a matter of months?
That’s where regular maintenance and preventative measures come into play. Think of it as the driveway equivalent of going to the gym – you’ve got to put in the work to keep those cracks at bay.
Start by keeping a close eye on your driveway, regularly inspecting it for any signs of new cracks or deterioration. And when you do spot something, don’t hesitate to jump into action. Nip those problems in the bud before they have a chance to snowball into something much more serious.
But it’s not all about reactive measures, my friends. Proactive steps, such as regularly sealing your driveway with a high-quality sealant, can go a long way in preventing those pesky cracks from ever forming in the first place. It’s like a protective shield for your concrete, shielding it from the ravages of Mother Nature and the wear and tear of daily use.
And let’s not forget about the importance of proper drainage. Making sure that water is channeled away from your driveway can do wonders in keeping those cracks at bay. After all, standing water and poor drainage are the sworn enemies of a well-maintained concrete driveway.
Driveway Crack Repair: The Ultimate DIY Challenge
So, there you have it – a comprehensive guide to sealing and repairing those dreaded driveway cracks. From understanding the underlying causes to mastering the art of epoxy application, we’ve covered it all.
But let’s be real here – driveway crack repair isn’t for the faint of heart. It’s a true DIY challenge, requiring a steady hand, a keen eye for detail, and a healthy dose of patience. And let’s not forget the satisfaction that comes with conquering those concrete conundrums all on your own.
As you embark on your driveway repair journey, remember to take it one step at a time. Rome wasn’t built in a day, and neither is a perfectly crack-free driveway. But with the right tools, the proper techniques, and a healthy dose of determination, you can transform your concrete eyesore into a driveway that’s the envy of the entire neighborhood.
So, what are you waiting for? Grab your tools, roll up your sleeves, and let’s get to work! Your driveway is counting on you, and I, for one, have the utmost faith in your DIY prowess. Now, let’s go seal some cracks and reclaim the glory of your concrete kingdom!
Bonus Tip: Hiring a Professional for Driveway Repair
Now, I know what you’re thinking – “But wait, what if I’m not the DIY type? What if I just want to hire someone to handle this whole driveway crack situation for me?” Well, fear not, my friends, because that’s a perfectly valid option as well.
Hiring a professional driveway repair service can be a great way to ensure that the job is done right, without all the hassle and headache of doing it yourself. These experts have the tools, the experience, and the know-how to tackle even the most stubborn of driveway cracks, leaving you with a flawless, crack-free surface that’s built to last.
And let’s not forget the peace of mind that comes with handing over the reins to a professional. No more worrying about whether you mixed the epoxy correctly or if you applied the sealant with the perfect level of precision. The pros will handle it all, allowing you to sit back, relax, and enjoy the fruits of their labor.
Of course, if you do decide to go the professional route, it’s important to do your due diligence. Research local driveway repair companies, read reviews, and make sure you’re hiring a reputable, trustworthy team. After all, you want to make sure your driveway is in good hands.
So, whether you’re a DIY aficionado or you prefer to leave the heavy lifting to the professionals, the choice is yours. But no matter which path you choose, remember that the ultimate goal is the same: to restore your driveway to its former glory and keep those pesky cracks at bay for good.

